Thursday 1 January 2015

Sometimes the simple stuff....isn't

Not too long ago I was given the job of photographing the new displays in two estate agency windows for a corporate brochure. New, illuminated, spinning, backlit displays had been installed. Seemed simple.

The problems started with a car being parked on the road, outside of one of the windows. My choice of angle was therefore limited. The local council was worried about a broken pavement issue and had placed a small barrier over the offending part of the pavement. And last but not least, the display was turning every so many seconds. So I decided to shoot a series of bracketed exposure sequences (did I not mention this was at night?) in order to cover the dynamic range and also hopefully get enough frames where the displays were still.

My rough sequence ended up with these three, the darker images provided the detail in the displays where the lights were 'burned out'


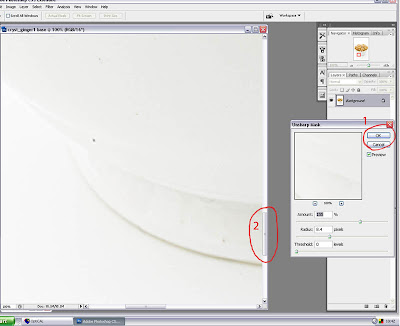
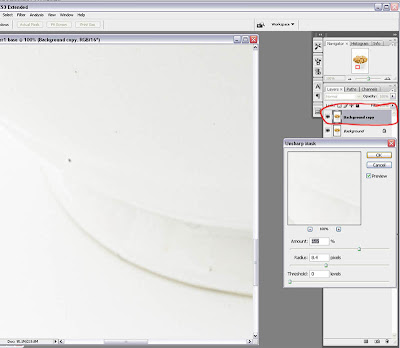
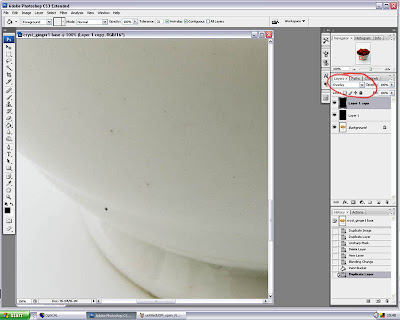
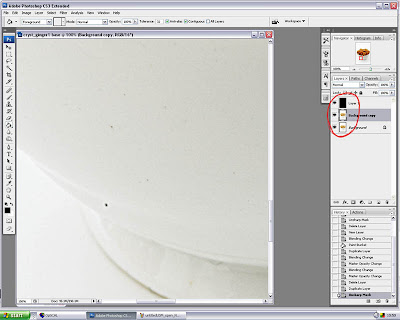
Thanks to the magic of Photoshop and luminance masking, I was able to get one combined image which had the full tonal range required by the human eye. Now I had to remove all the debris from the image, leaves on pavement, the barrier, the broken pavement covered by the barrier and the general marks and spots that are part of the everyday life of a shop window.


So, if you ever need a simple image taken...or indeed a complex one... please contact me at here


Tuesday 7 August 2012

Having fun with the software

It's always a learning curve with new software but for 3D software it's a very steep one.

Anyhow, just starting to get some results from it.  Basic financial concept stock, not exactly new ground for me but a lot of fun in creating new images for old concepts. Revisiting and refreshing is the best gloss I can put on it.


A competely rendered image or CGI as I guess I now have to call it. Best thing about it, the render takes a few hours so I can set it on it's way, make a cup of tea and watch the television......and still be at work!


Sunday 4 December 2011

There's always work to be done.

Well earlier this year we decided to revisit one of my old holiday destinations, the Cote D'Azur, namely Antibes.

As always on holiday it's a fight between wanting to shoot some travel stock and having a holiday. I did shoot some images but also was asked to shoot some interiors for a hotel (Chambres D'Hotes) website. Busman's holiday sprang to mind. Anyhow it was fun given the difficult lighting conditions, very bright exterior and dark (but cool) interior so a sequence of shots were used to get a full dynamic range.

One example from the shoot.


Interiors are part of a range of photographic assignments undertaken. Based in Norwich/Norfolk but travelling nationwide - contact me here (opens in a new window).

Friday 16 April 2010

Layer methods to aid dust/spot detection

These are a few simple methods using two techniques and a combined technique to help with the task of finding and cloning or spotting dust or dirt marks on an image file. Different ones work well for different parts of the image but I have shown them used on a high key image shot on white.

This is an example where some of the water spots/lubrication spots from a shutter as well as dirt can be made easier to find. I use a combination of a number of these various techniques at various stages of cleaning the image.

Normal image view (below).
This is the orginal high key image showing the base of a white sugar bowl at 100% (the base is not part of the zone of focus for the picture) and shows the view that would be seen when correcting an image. Some spots can be seen but there are others there that might not be obvious with this view.


Method 1. Basic USM (below).
This very simple method (below) shows the opening of the Unsharp Mask (USM) dialogue box and the application of USM to oversharpen the image. The amounts used here are 155/8.4/0 (they can be varied to suit the image) but the box remains open, the OK button is not clicked (1) and the image can only be scrolled around (2). Once a spot is detected the USM dialogue box is closed, the spot cloned and the process repeated. This simple method works well for checking very clean images or as a last check after other cleaning methods have been used.

Method 1A. Basic USM applied in a layer (below).
With this method a background duplicate layer is created either using the layer palette menu or the main layer menu. With the background copy layer active the same USM is applied as Method 1 but the USM is OK'ed (click the OK button). This applies the USM to the duplicate layer. Now click the original background layer to make it active and then you can use the cloning tool or patch tool to clean the image. To see the results you need to click the USM layer on/off. When finished the duplicate USM layer is deleted. One advantage to this over the previous method is that you can use the navigator to move around the image as well as the scroll bars. It also enables you to zoom in and magnify any areas which is not possible with the previous method. As with all layer methods the opacity and fill of the layer in any of these techniques can be altered to suit the image.


Method 2. Applying a black overlay layer (below).
A new layer is created and with this layer active it is filled with black, using in this case the paint bucket. The blending mode is set to overlay and the background layer is then made active and the spots cloned. This method is very effective in high key or light tonal areas. The great advantage over the USM methods is that the result of the cloning can be seen immediately: also the opacity of the black layer can be altered to suit the image. When all cloning is finished the new layer is deleted.

Method 2A. Applying two black overlay layers (below).
The same method as 2 except that a second layer is created in exactly the same way. This works well for high key areas where the spots may be very difficult to find. Both layers are deleted when finished.

Method 3. This is a simple combination of the two other methods (below).
A duplicate background layer is made as per Method 1A and a new layer is made on top of this using the black layer method - Method 2. It really makes the spots stand out but does not have the advantage of seeing the results without clicking off the USM layer (background copy layer). The USM layer can be occasionally deleted and a new one created to make sure all the spots are gone.


Since I do a lot of high key work I spend a lot of time checking for marks/spots/dust on the images but using these methods it is much easier to get a nice clean image. A combination of any of these techniques can be used for all types of images (especially for detecting problem spots in skies).

My preferred method is two black overlay layers with a USM background copy layer. The various layers can be clicked on and off depending on the tonal values of the image area being worked on. The USM layer is occasionally deleted and a new one created to check the progress of the spotting. My final check is the open USM dialogue box method 1.

The layer methods can be recorded as an action so that the initial creation of multiple/duplicate layers and the filling with black/USM can be done by simply playing the pre-recorded action. The black layer can be recorded using edit > fill > black as using the foreground colour, as shown in the pictures, it would have to be manually set to black if recorded using the paint bucket.

Now where do I place those images?

So who ya gonna call? OK which stock library ya gonna call? It's a perennial question for people looking beyond the most obvious candidates online.

Looking for credit lines in the media is one obvious place to start, find a library that has credit lines for works in the same areas that you can supply, that's a start.
Otherwise it's looking at the search facilities for members of the stock library trade bodies.

In the UK, that's BAPLA. and they have an A-Z search by name but maybe more useful is their category search.
http://www.bapla.org.uk/index.php?option=com_content&task=view&id=15&Itemid=44

In the US, it's PACA http://www.pacaoffice.org/ and the membership directory can be searched by category or name.

In Europe it's CEPIC who represent the trade associations http://www.cepic.org/directory so you can link to the association and search via them.

Getting the right images to the right libraries is an important part of the stock business.